
 En
 English
 简体中文

How Common Is Timing Belt Failure and When Should You Replace It
Short Answer
How common is timing belt failure? When a timing belt is replaced inside the interval written in the vehicle maintenance manual, failure is rare. Most broken timing belt cases come from belts that stayed on the engine beyond the recommended mileage or beyond the recommended age, or from belts that were damaged by a leaking seal, a worn tensioner or a seized water pump. A timing belt keeps the crankshaft and camshaft synchronized, so one failure can stop the engine instantly and, on an interference engine, bend valves in the same moment.
60,000-100,000 mi
Typical timing belt replacement distance, equal to roughly 96,000-160,000 km
5-10 years
Typical age limit, because rubber hardens even when the vehicle is parked
2 : 1
Crankshaft to camshaft speed ratio the timing belt must hold on every revolution
5 parts
Components normally replaced together with the timing belt in a complete kit
How Common Is Timing Belt Failure in Real Service Conditions
A timing belt is a wear item with a defined service life. Workshops that handle engines every day see timing belt failure mostly as a maintenance-interval problem rather than a defect problem. A belt that has run 40,000 miles inside a clean, dry timing cover is in a very different condition from a belt that has run 130,000 miles with a weeping camshaft seal behind it.
The rubber body of a timing belt is a compound designed for flexing, heat and constant tooth loading. Every revolution bends the belt around small pulleys, and every combustion pulse sends a torque fluctuation through the teeth. Heat cycles harden the rubber, the tooth surface loses its fabric jacket, and the tensile cords inside begin to lose bonding with the rubber. These changes are gradual. The belt gives very little warning, because the damage is hidden behind a plastic or metal timing cover.
The chart below shows how the relative risk of a timing belt breaking changes as the belt runs past its recommended interval. The values are an indicative illustration built from typical service experience. Actual numbers depend on engine design, belt material, climate and driving pattern.
Relative timing belt failure risk compared with the recommended replacement interval
Horizontal axis: distance or age as a percentage of the manufacturer interval. Vertical axis: relative risk index. Indicative illustration only.
The curve is flat while the timing belt stays inside its interval and rises steeply once the interval is passed. This is the reason a timing belt is replaced on a schedule instead of being inspected and left in place. A belt that looks acceptable from the front can still have damaged cords inside.
What Causes a Timing Belt to Fail
Timing belt failure rarely has a single cause. A belt normally fails when a worn condition meets a high-load moment, such as a cold start, a hard acceleration or an engine stall. The bars below show the typical contribution of each cause when failed belts are examined in service.
Indicative share of contributing causes in timing belt failure cases
Shares are indicative and are shown to explain relative importance, not to describe any single engine family.
Overdue replacement
Rubber ages by heat and time. A timing belt that has passed its age limit can break at low mileage, and a low-mileage vehicle that spends most of its life parked is not protected from this ageing.
Bearing and pulley wear
The tensioner and idler pulleys carry the full belt load. A bearing with roughness or play lets the belt run with uneven tension, which wears one edge and can make a tooth shear off.
Fluid contamination
Engine oil and coolant soften the rubber and weaken the bond between cord and body. A camshaft seal or crankshaft seal that leaks into the timing cover shortens belt life quickly.
Water pump failure
On many engines the timing belt drives the water pump. A pump bearing that seizes stops the pulley, and the belt either jumps teeth or snaps under the sudden load.
Interference Engine and Non-Interference Engine Damage
The cost of a timing belt failure depends on engine geometry. In an interference engine, the piston and the open valve occupy the same space at different moments in the cycle. When the timing belt breaks, the camshaft stops while the crankshaft keeps turning through inertia, and a piston meets an open valve. In a non-interference engine, the clearance is large enough that valves and pistons never touch, so the engine stops and the repair is limited to replacing the belt and related parts.
| Item | Interference engine | Non-interference engine |
|---|---|---|
| Piston to valve clearance | Overlapping travel paths | Separate travel paths |
| Result of timing belt breakage | Bent valves, piston crown damage, possible cylinder head damage | Engine stops, internal parts normally undamaged |
| Typical repair scope | Cylinder head work, valves, guides, belt kit, sometimes pistons | Timing belt kit and re-timing |
| Preventive replacement value | Very high | High |
| Recommended action | Never extend the interval | Follow the interval to avoid roadside stoppage |
The engine type should be confirmed from the vehicle manual or engine code before any decision to postpone a timing belt replacement. A mistaken assumption about a non-interference design is expensive when the assumption is wrong.
Timing Belt and Timing Chain Parameter Comparison
Many engines use a timing chain instead of a timing belt. The two systems solve the same synchronization problem with different materials, and each shows a different failure pattern.
| Parameter | Timing belt | Timing chain |
|---|---|---|
| Material | Rubber compound with glass fiber or aramid tensile cord | Steel links and pins |
| Typical replacement interval | 60,000-100,000 miles or 5-10 years | Often matched to engine life, with inspection beyond 150,000 miles on some engines |
| Operating noise | Low | Moderate to higher |
| Lubrication | Runs dry behind a cover | Lubricated by engine oil |
| Typical failure pattern | Sudden breakage or tooth shear | Gradual stretch with rattling noise |
| Weight | Light | Heavier |
| Replacement labor | Medium | Often higher |
| Warning before failure | Limited | More noticeable |
Warning Signs of a Timing Belt Close to Failure
A timing belt gives fewer warnings than most wear parts, but some signs do appear. Treat any of the following as a reason to inspect the timing belt before the next long trip.
Ticking from the front of the engine
A steady tick or scraping sound that follows engine speed can come from a worn tensioner, a dry idler bearing or a belt edge rubbing the cover.
Hard starting or rough idle
A belt that has jumped one tooth shifts valve timing slightly. The engine cranks longer, idles unevenly and loses power.
Sudden stalling
An engine that stops without a fuel or ignition reason may have lost timing belt drive to the camshaft.
Oil pressure irregularity
On engines where the belt drives an oil pump or balance shaft, damaged drive can show up as unstable oil pressure.
Visible belt damage
Cracks across the tooth roots, missing teeth, fraying at the edge or a shiny glazed surface all mean the belt should be replaced.
Leakage near the timing cover
Oil or coolant marks around the cover seam point to a seal or pump leak that is contaminating the belt.
How a Timing Belt Is Inspected
Because a timing belt sits behind a cover, inspection means removing a cover section. A technician follows a fixed order so that nothing is missed.
1
Check the cover area
Look for oil, coolant or dust trails on the cover and around the seal seats before removing anything.
2
Inspect tooth faces
Examine every tooth for cracking at the root, chipped corners and worn fabric on the tooth surface.
3
Inspect belt edges and back
Fraying on one edge points to pulley misalignment. A hardened, glossy back surface points to heat ageing.
4
Test pulleys by hand
Turn the tensioner, idler and water pump pulley. Roughness, noise or side play means replacement.
5
Verify timing marks
Confirm that crankshaft and camshaft marks align at the specified position before and after any work.
6
Record the result
Write down mileage, date and the condition found, so the next interval is based on facts.
Replacement Interval and Operating Conditions
The manual interval assumes normal use. Hot climates, dusty roads, frequent short trips and heavy loads all raise belt temperature or stress. The table below shows common conditions and how technicians usually treat the interval.
| Operating condition | Effect on timing belt | Interval approach |
|---|---|---|
| Normal mixed driving | Standard wear | Follow manual distance and age |
| High ambient heat | Faster rubber hardening | Replace at the early end of the range |
| Short trips in cold weather | Repeated cold flexing, moisture in the cover area | Use the age limit as the priority |
| Dusty or sandy roads | Abrasive wear on tooth surface | Inspect cover seal and shorten interval |
| Towing or heavy load | Higher tooth load | Replace at the early end of the range |
| Vehicle stored for long periods | Age hardening with little mileage | Replace by age, not by distance |
| Oil leak found | Rubber softening | Repair leak and replace belt immediately |
The rule used in most workshops is simple: replace the timing belt at whichever limit comes first, distance or age.
Inside a Timing Belt: Materials That Decide Service Life
Two timing belts with the same tooth count and width can have very different service lives. The difference sits in the rubber compound, the tensile cord and the tooth fabric. A well-engineered timing belt is built from four layers that each have a task.
HNBR rubber body
Hydrogenated nitrile rubber resists heat, oil mist and ageing far better than older chloroprene compounds. It keeps its flexibility across a wide temperature range and holds tooth shape under load.
Tensile cord
The cord carries the pulling load and sets stretch resistance. Glass fiber cord suits most passenger engines, while aramid cord is used where higher strength and lower elongation are required.
Tooth fabric jacket
A woven nylon-based fabric covers the teeth to reduce friction and wear on the pulley. A thicker or treated jacket extends tooth life and lowers running noise.
Back layer
The smooth back runs against idlers and the tensioner. A uniform back thickness keeps tension steady and prevents cracking at the surface.
| Material option | Heat resistance | Stretch under load | Typical use |
|---|---|---|---|
| Chloroprene body with glass fiber cord | Moderate | Low | Older and lower-output engines |
| HNBR body with glass fiber cord | High | Low | Modern gasoline and diesel passenger engines |
| HNBR body with aramid cord | High | Very low | High-torque and high-temperature engines |
How Our Factory Produces and Tests Timing Belt Products
A timing belt that reaches your engine has gone through a controlled production chain. Each stage has a measurable output, so that belts from one production lot behave the same as belts from the next.
Stage 1
Compound mixing
Rubber, fillers and curing agents are weighed and mixed to a fixed formula. Each batch is checked for hardness and cure behavior before it moves on.
Stage 2
Cord treatment
Glass fiber or aramid cord receives an adhesive treatment so that the rubber bonds to the cord across the full life of the belt.
Stage 3
Molding and curing
The belt sleeve is formed in a toothed mold under controlled temperature and pressure, which sets tooth profile and pitch accuracy.
Stage 4
Cutting to width
The cured sleeve is cut into individual belts. Edge finish and width tolerance are measured on sample pieces from every sleeve.
Stage 5
Dimensional inspection
Length, pitch, tooth height and width are checked against drawings. Belts outside tolerance are rejected.
Stage 6
Marking and traceability
Each belt carries a part number, tooth count and lot code, so any belt can be traced back to its production date and material batch.
| Laboratory test | Method | What it confirms |
|---|---|---|
| Tensile strength | Belt pulled until cord breaks | Cord strength and bonding |
| Heat ageing | Extended exposure at elevated temperature | Rubber stability and crack resistance |
| Dynamic fatigue | Running on a test rig across a defined number of cycles | Tooth and cord endurance under load |
| Oil and coolant immersion | Soaking followed by hardness and swelling checks | Resistance to fluid exposure |
| Cold flexibility | Flexing at low temperature | Cold-start durability |
| Tooth shear | Load applied to a single tooth | Tooth root strength |
| Pitch and length measurement | Calibrated measuring equipment | Fit and timing accuracy |
Timing Belt Kit Contents and Specification Guide
A complete timing belt kit replaces the belt together with the parts that share its life. Installing a new belt on a worn tensioner places the new belt under the same stress that damaged the old one, and the saved parts cost is quickly lost when the second repair arrives.
| Kit component | Function | Why it is replaced together |
|---|---|---|
| Timing belt | Synchronizes crankshaft and camshaft | Primary wear item |
| Tensioner | Sets and holds belt tension | Spring and bearing weaken with age |
| Idler pulley | Guides belt path | Bearing life matches belt life |
| Water pump | Circulates coolant, belt-driven on many engines | Labor overlaps with the belt job |
| Camshaft and crankshaft seals | Keep oil away from the belt | Accessible only during belt removal |
| Mounting bolts and clips | Secure covers and pulleys | Stretch bolts must not be reused |
A timing belt is selected by matching four values: tooth profile, number of teeth, belt width and pitch. These values must match the original specification exactly. A belt with one tooth more or less changes valve timing by the angle of that tooth, and a belt with the wrong width can ride against the pulley flange.
| Specification | Example range | Meaning |
|---|---|---|
| Tooth profile | Trapezoidal, HTD round tooth, modified curvilinear | Shape of the tooth, must match the pulley groove |
| Pitch | 8 mm, 9.525 mm, 14 mm | Distance between tooth centers |
| Number of teeth | 90 to 180 | Sets belt length and timing |
| Width | 17 mm to 32 mm | Contact area with the pulley |
| Cord material | Glass fiber or aramid | Strength and stretch behavior |
| Operating temperature | Approximately -35 C to 130 C | Rubber compound working range |
Tooth count and tooth profile are printed on the belt back. When the belt is out of the engine, read the marking before ordering a replacement, and confirm it against the engine code.
Timing Belt Installation Guidelines
Many timing belt failures that look like product problems are installation problems. A belt installed with wrong tension or with misaligned marks can fail within a few thousand miles. The following points apply to nearly every engine.
Before installation
Clean the timing area, check seals for dryness, and rotate the engine to its timing position. Set both camshaft and crankshaft marks and lock them if the engine design provides locking tools.
During installation
Fit the belt in the specified order, keeping the drive side tight. Never bend the belt sharply or twist it, because a crease damages the cord permanently.
Tension setting
Set tension with the specified tool or procedure. Excess tension overloads bearings and causes whine, while low tension allows tooth jump.
After installation
Turn the crankshaft by hand through two full turns, recheck all marks and tension, then refit the cover and start the engine.
| Common installation error | Resulting problem |
|---|---|
| Reusing the old tensioner | Tension loss and early belt wear |
| Skipping new seals | Oil contact with the new belt |
| Over-tightening the tensioner | Bearing noise and shortened life |
| Turning the engine backward after fitting | Slack on the drive side and tooth jump |
| Using a belt with the wrong tooth count | Timing offset and power loss |
| Forcing the belt over a pulley flange | Cord damage not visible from outside |
Storage and Handling of a Timing Belt Before Fitting
A timing belt can also age on a shelf. Store belts flat or hanging on a wide roll, away from direct sunlight, ozone sources such as electric motors, and any solvent or oil. A cool and dry room around room temperature suits rubber best. Keep the belt in its sealed packaging until the moment of fitting, and never fold it into a bend tighter than the minimum bending radius, which is roughly the size of the smallest pulley in the system.
Check the production date code before installation. A belt that has been stored beyond the period recommended by its maker should be inspected carefully for surface cracking, hardening or stickiness.
Preventive Replacement Cost Compared with Repair After Failure
The cost gap between planned replacement and failure repair is the strongest argument for keeping to the interval. The comparison below shows relative effort and typical outcomes.
| Scenario | Work required | Relative cost | Vehicle downtime |
|---|---|---|---|
| Planned timing belt kit replacement | Belt, tensioner, idler, seals, water pump if driven by belt | 1x | Same day to one day |
| Failure on non-interference engine | Belt kit, towing, re-timing | 1.3x to 1.8x | One to two days |
| Failure on interference engine, light damage | Valves, guides, head gasket, belt kit | 3x to 5x | Several days |
| Failure on interference engine, severe damage | Cylinder head or engine replacement | 6x or more | One week or longer |
Relative cost values are indicative. Labor rates and part prices differ by region, but the proportions between planned replacement and failure repair remain similar from one engine to another.
Timing Belt Product Range for Different Engine Applications
Different engines place different demands on a timing belt. We build timing belt products in several constructions so that the belt matches engine torque, temperature and tooth profile.
Gasoline engine timing belt
HNBR body with glass fiber cord, tooth fabric jacket tuned for low noise. Suited to four-cylinder and six-cylinder engines in passenger vehicles.
Cord: glass fiber | Temperature: -35 C to 130 C
Diesel engine timing belt
Higher tooth strength and thicker jacket for the greater torque pulses of diesel combustion. Tolerates higher belt temperatures.
Cord: glass fiber or aramid | Temperature: -35 C to 135 C
High-torque timing belt
Aramid cord and reinforced teeth for turbocharged and high-output engines. Very low elongation keeps valve timing stable under load.
Cord: aramid | Temperature: -35 C to 140 C
Complete timing belt kit
Belt, tensioner, idler pulleys and seals packed as one matched set, so every part shares the same service life.
Contents: belt, tensioner, idlers, seals
Timing belt kit with water pump
Adds a coolant pump with a cast impeller and sealed bearing for engines where the belt drives the pump.
Contents: kit plus water pump and gasket
Tensioner and idler pulley set
Precision bearings with sealed grease fill and checked rotation torque. Available as a stand-alone set for engines that need pulley replacement.
Bearing: sealed, pre-lubricated
Fitment Information We Need to Match a Timing Belt Kit
Matching a timing belt kit takes only a few facts. Gather the items below and the correct product can be identified quickly and without guesswork.
Engine identification
Engine code, displacement, fuel type and production year. The engine code is stamped on the block or printed on the registration documents.
Belt marking
Part number, tooth count and tooth profile printed on the old belt back. A photo of the marking is enough.
Pulley details
Number of pulleys in the belt path, tensioner type and whether the water pump is belt-driven.
Mileage and age
Distance and years since the last timing belt replacement, which helps decide whether a full kit is the right choice.
Frequently Asked Questions About Timing Belt Failure
How common is timing belt failure?
Timing belt failure is uncommon when the belt is replaced inside the maker interval, and it becomes common among belts that run well beyond that interval. Contamination, worn pulleys and installation errors add to the risk.
Can a timing belt break without warning?
Yes. A timing belt usually breaks with very little warning. Cracks and tooth damage develop out of sight, so a belt can appear normal until it breaks. Replacement by distance and age is the only reliable protection.
What happens to the engine when a timing belt snaps?
The camshaft stops while the crankshaft keeps moving for a moment. On an interference engine, pistons strike open valves. On a non-interference engine, the engine simply stops.
How many miles does a timing belt last?
Most timing belts are specified for 60,000 to 100,000 miles, or 96,000 to 160,000 km, or 5 to 10 years. The exact figure comes from the vehicle manual and depends on engine design.
Does a timing belt wear out when the vehicle is not driven?
Yes. Rubber ages with time and temperature, so a timing belt in a parked vehicle still hardens and cracks. This is why an age limit exists alongside the distance limit.
Should the water pump be changed with the timing belt?
When the water pump is driven by the timing belt, replacing it during the same job is standard practice. The labor is shared, and a pump failure later would force a second belt job.
How can I tell whether my engine uses a timing belt or a timing chain?
The vehicle manual and the engine code give a direct answer. A timing belt sits behind a plastic or thin metal cover on the engine front, while a timing chain is enclosed in a metal housing sealed with engine oil.
Can a damaged timing belt be repaired?
No. Cords inside a damaged timing belt cannot be restored, and a belt with cracks, missing teeth or fraying must be replaced with a new one.
Is a more expensive timing belt always the longer-lasting one?
Service life depends on materials and construction rather than price. An HNBR body, correctly treated cord and a durable tooth jacket decide how long a timing belt lasts on a given engine.
Need a Matched Timing Belt Kit?
Send the engine code, the tooth count printed on your current timing belt and the vehicle year. Our engineers will return a matched timing belt kit recommendation with full specifications and a drawing.
Hot Products
-
 View More
-
 View More
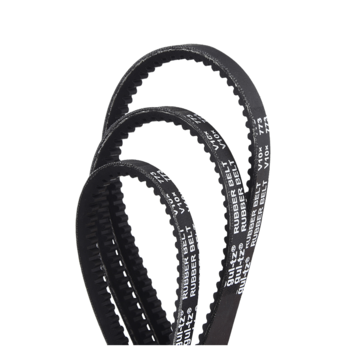
V-belt For Industry
-
 View More
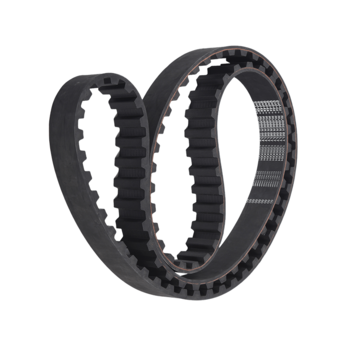
T Type Industry Rubber Synchronous Belt
-
 View More
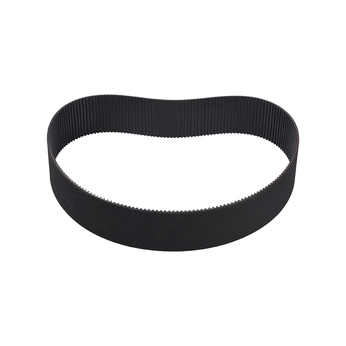
Toothed wedge belt
-
 View More
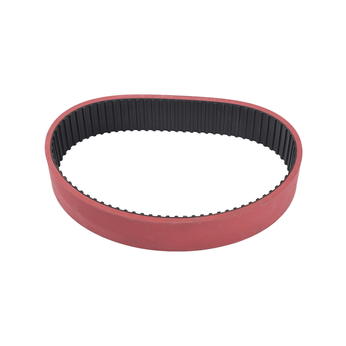
Thickened timing belt
-
 View More
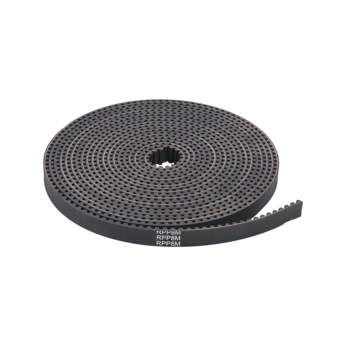
Open Timing Belt
-
 View More
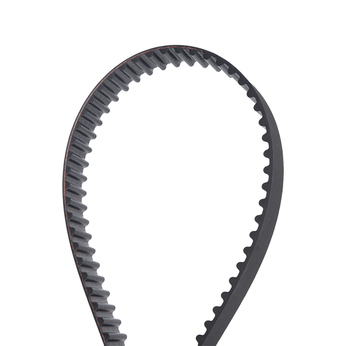
Automotive V-belt
-
 View More
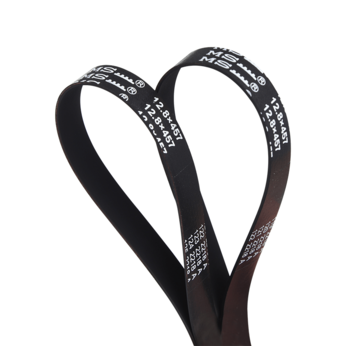
Rubber Flat Belt
-
 View More
Ribbed Belt
-
 View More
Synchronous Pulley
-
 View More
Arc tooth industrial rubber synchronous belt
-
View More
Automotive timing belt

Do you have a question? Feel free to contact!
 Tel: +86-0574-62498188 62497298
 Fax: +86-0574-62497297
 E-mail:
 Add: No. 65, Middle Jinniu Road, Moushan Town, Yuyao City, Zhejiang Province, China
Copyright © Ningbo GUL TZ Rubber Belt Co., Ltd. All rights reserved.

OEM Rubber Driving belts Manufacturers
